
Editing Your Website
Editing your Webflow website
Thank you for choosing Rugby Web Design Limited to design and build your Webflow-powered website.
Your website has been professionally crafted using Webflow, a powerful modern platform trusted by leading organisations worldwide. It allows you to update your website content yourself, quickly and safely, without requiring any technical knowledge.
Accepting Your Webflow Invitation
You will receive an email from Webflow inviting you to create your account.
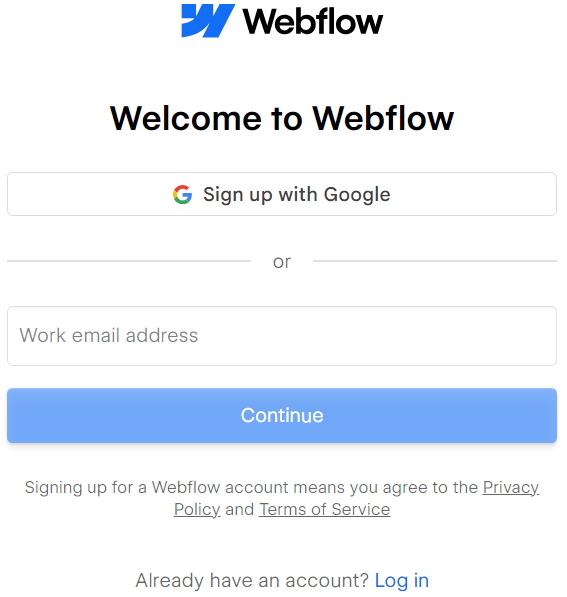
Simply follow these steps:
- Click the link in the email
- Create your Webflow account and choose your password.
Your login details are private and can be used whenever you wish to make updates. Tip: If you do not share your PC, you may prefer to stay logged in, reducing the number of steps needed to access your website each time.
Your Webflow Dashboard
Once complete, you will have full access to edit your website content via the Webflow Dashboard. You can log in at webflow.com/dashboard. I'd recommend bookmarking this page for easy access.
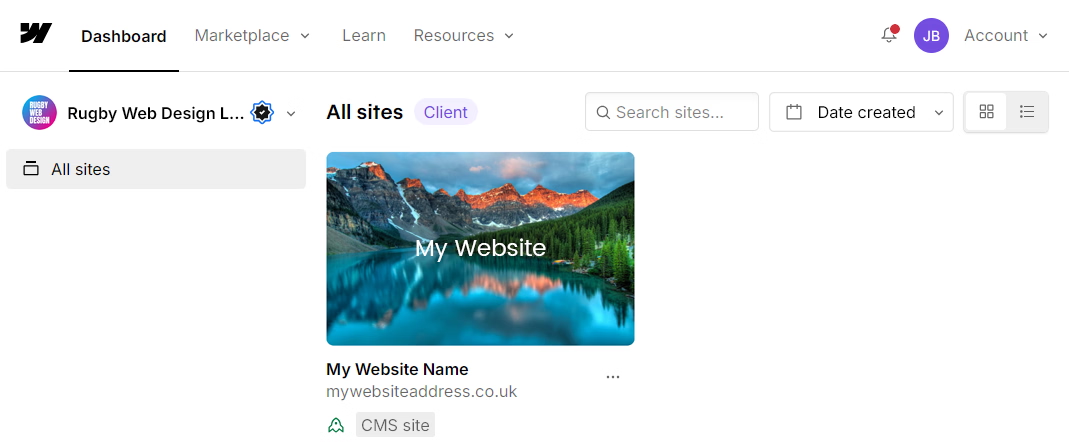
Some clients may have multiple websites listed here.
Click on your website thumbnail to open it. You will then enter the Content Editor, where you can safely update your website content.
Designer vs Content Editor
Your Webflow website has been carefully structured into two separate environments. This is intentional and ensures the design remains protected while giving you the freedom to manage and create your content with confidence.
- Webflow Designer - for me
- Content Editor - for you
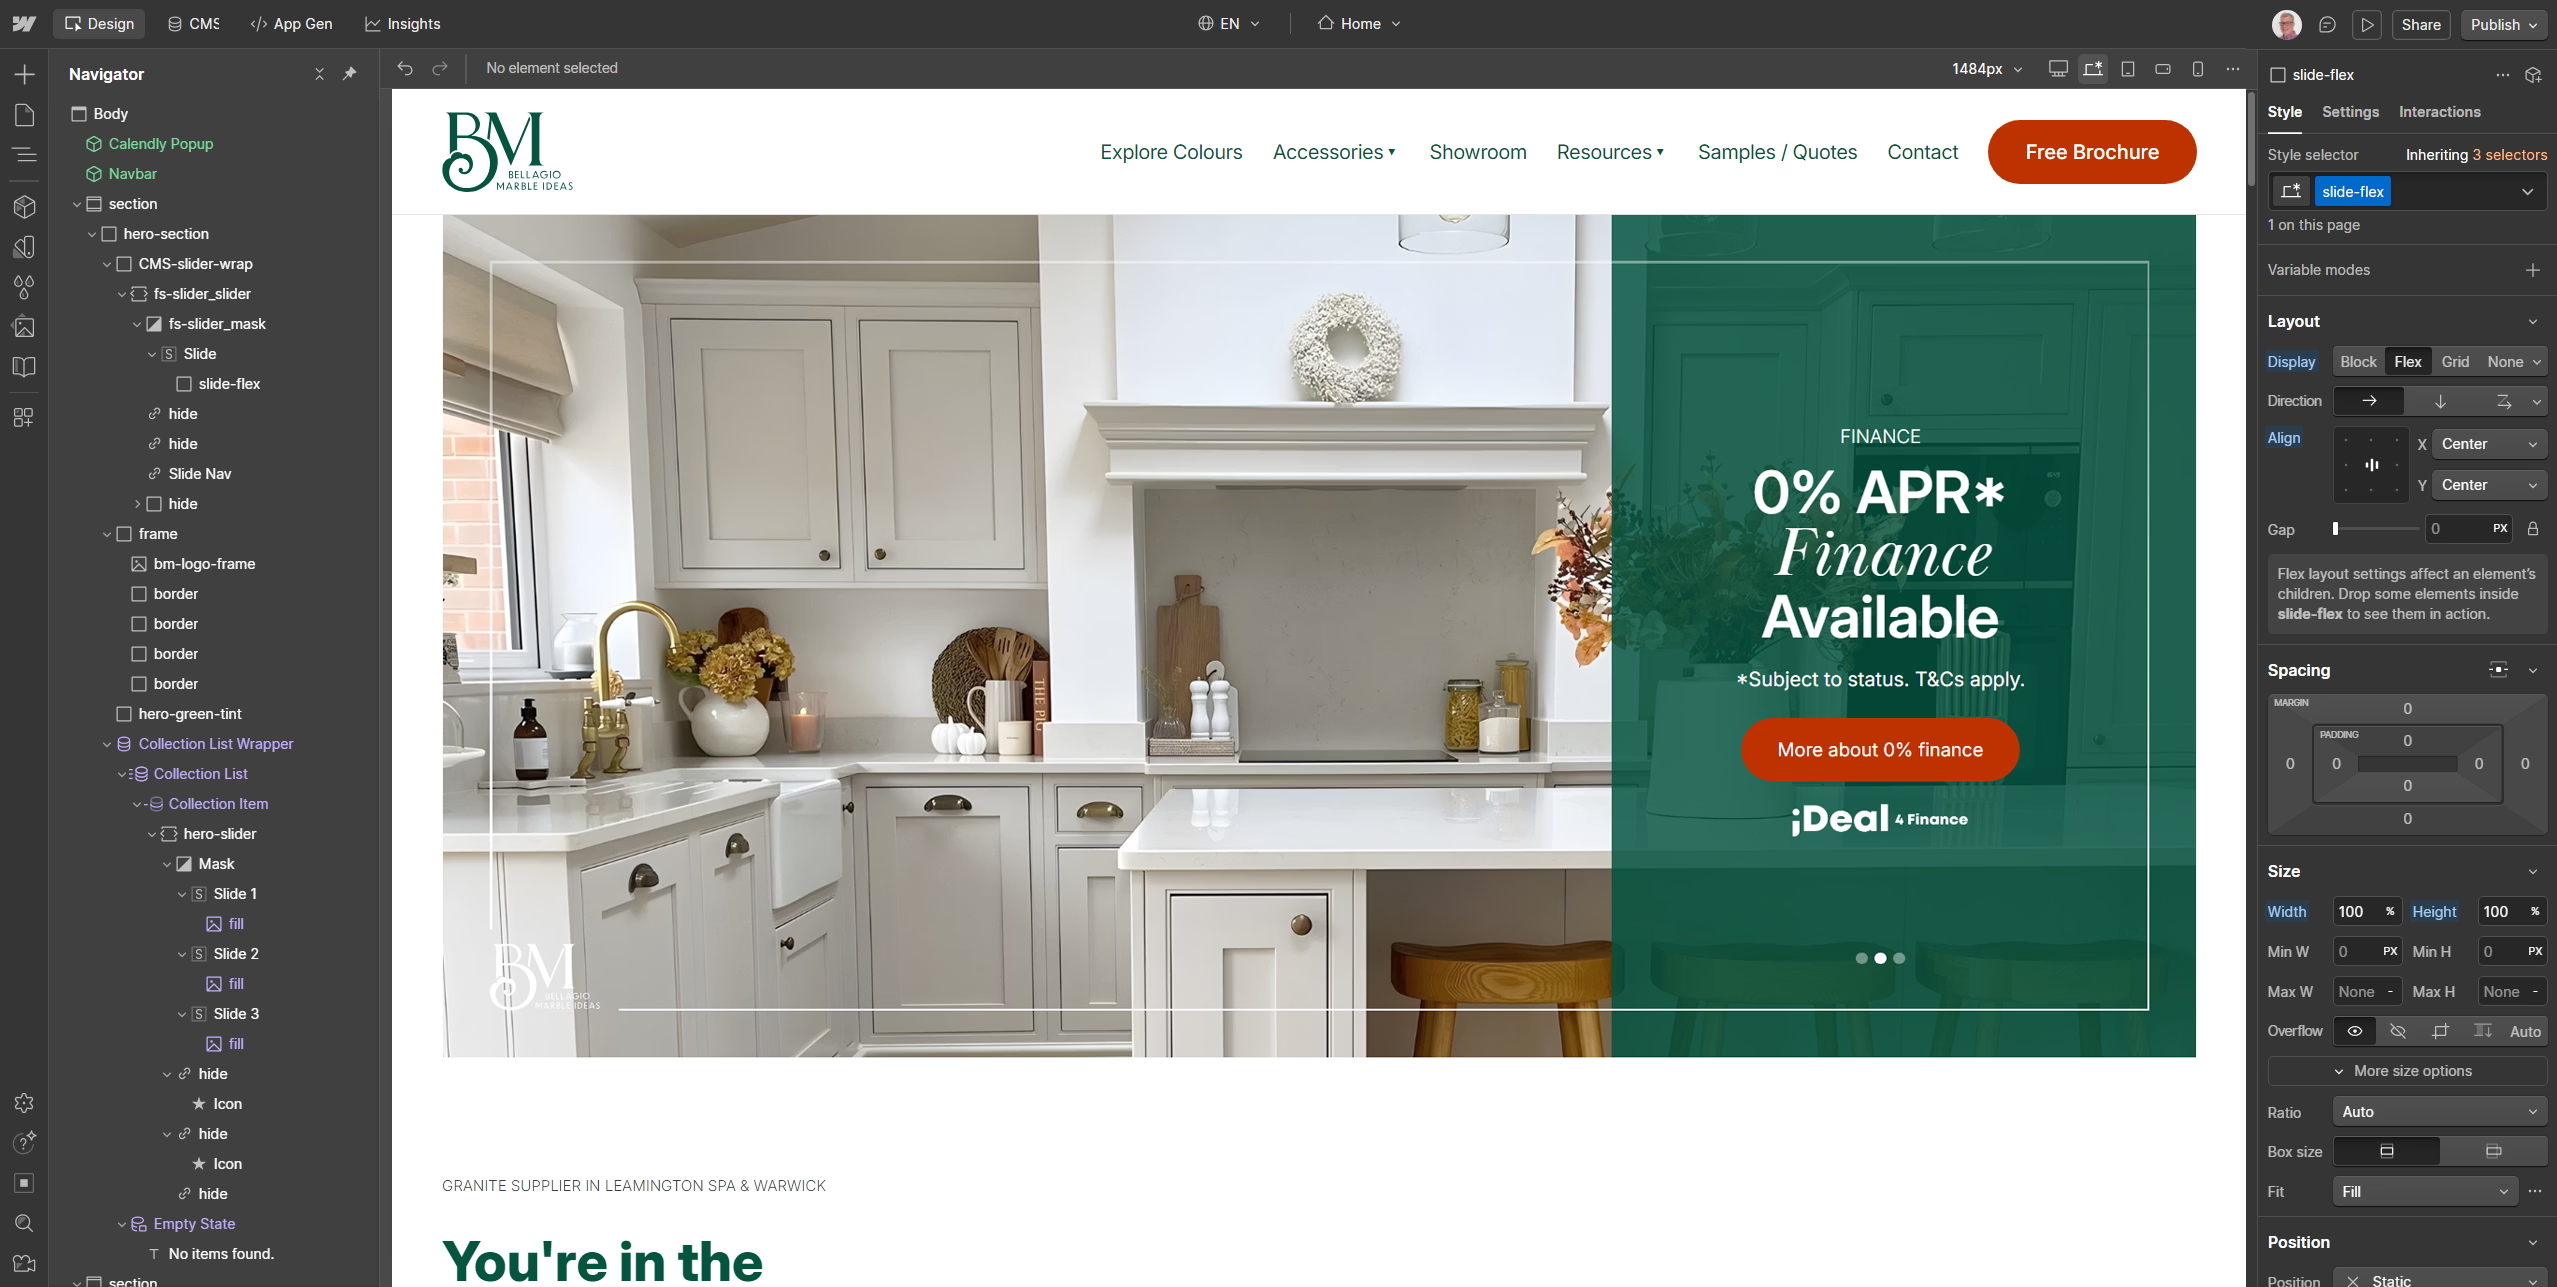
The Designer - My design tool
This is the professional build environment I use to create and maintain your website’s structure, functionality, and visual design. This includes:
- Page layouts
- Fonts and colours
- Mobile responsiveness
- Animations and interactions
- CMS structure (blogs, case-studies, products etc)
This area controls the technical foundation of your website and is intentionally restricted. It is more complex and not required for day-to-day content editing, ensuring your website remains protected, consistent, and functioning correctly.
Content Editor - Your Access
You have been given secure Content Editor access. This is a 'lite' version of Webflow and allows you to safely manage and update your website content, including:
- Updating Text
- Swapping Images
- Creating or deleting Blog posts / Team profiles / Products
- Changing SEO settings (if advised)
The Content Editor is specifically designed to prevent changes that could affect the layout or structure of the website.
This means you cannot accidentally break the design. You have full control over your content, while the underlying structure remains protected. This provides the ideal balance between flexibility, ease of use and long-term reliability.
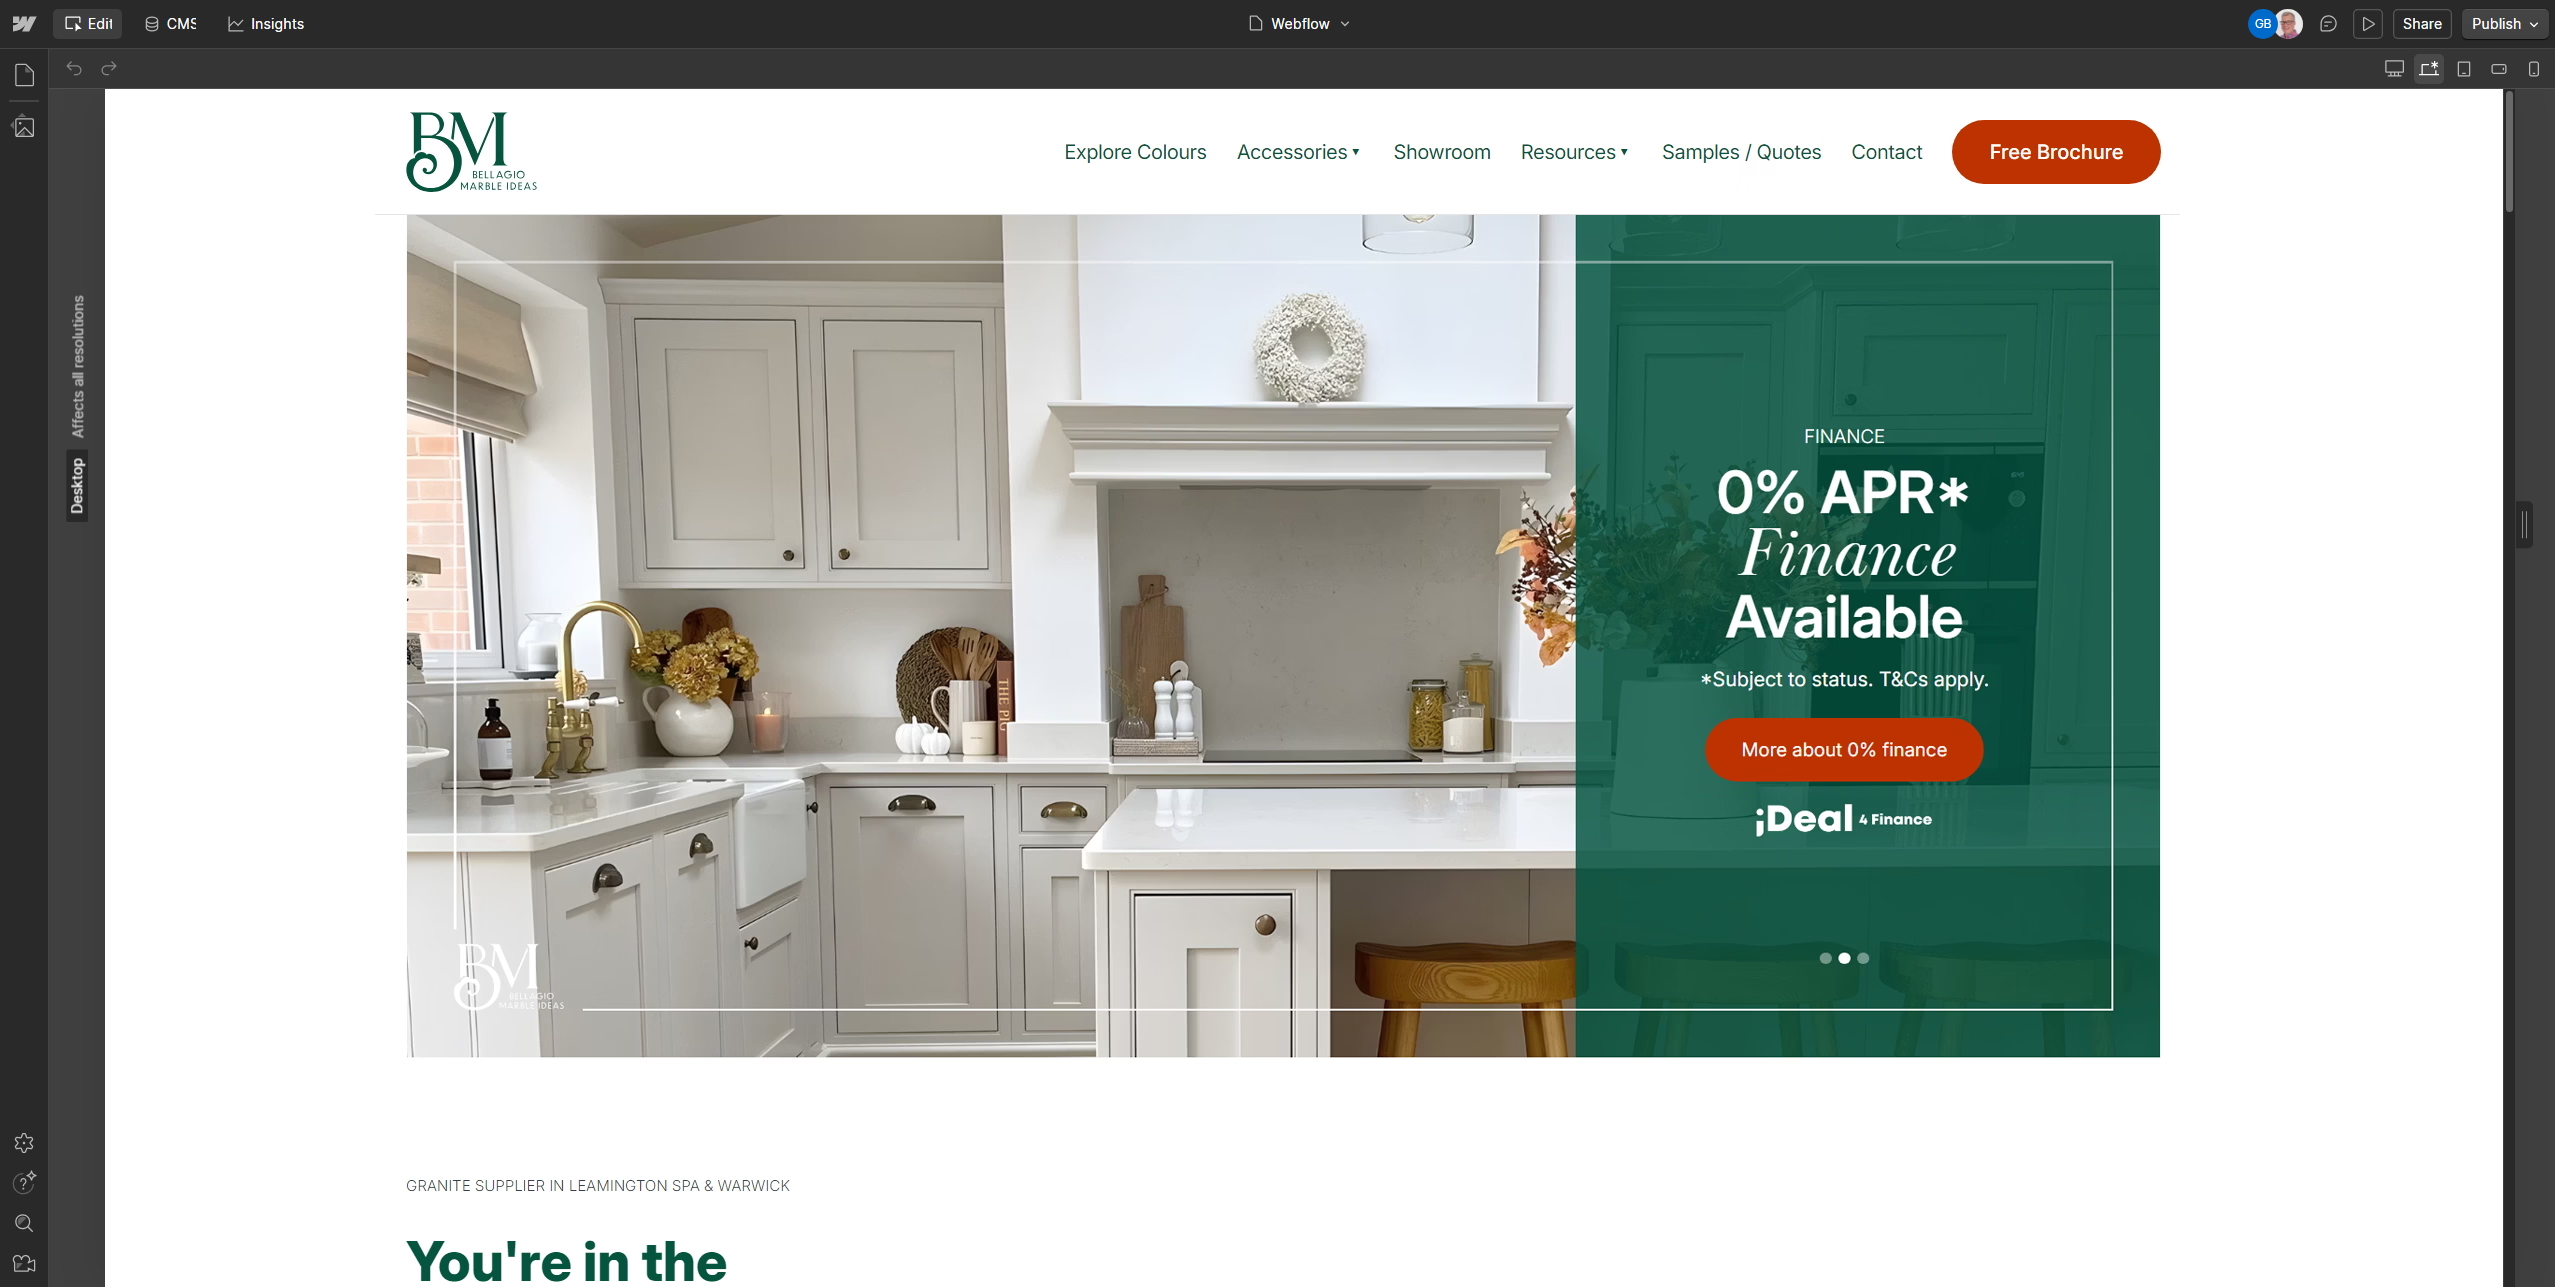
Editing your website
The Content Editor allows you to make changes directly on the page, while viewing the website exactly as your visitors see it.
You can:
- Update Text
- Swap Images and Icons
- Create/edit/delete Blog posts, Team profiles, Products etc
- Change SEO settings
The editing tools are simple and appear only when needed. Importantly, you are not changing the design or structure. You are only updating the content. This ensures the website remains visually consistent and technically sound.
On the left of the screen:
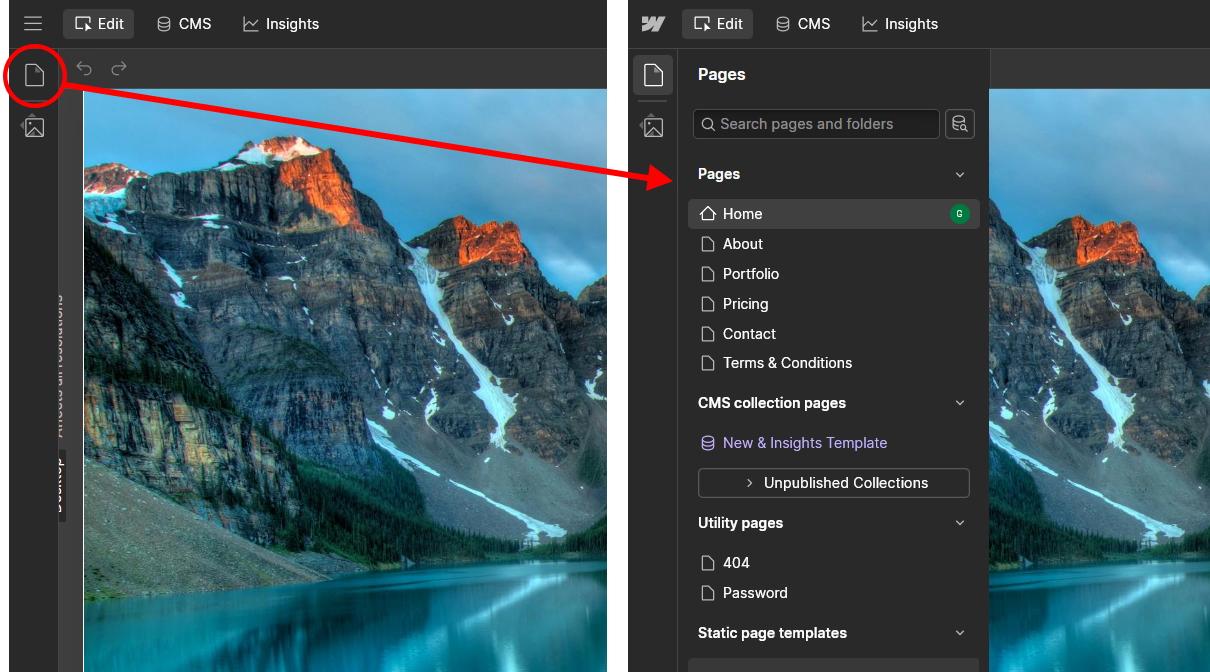
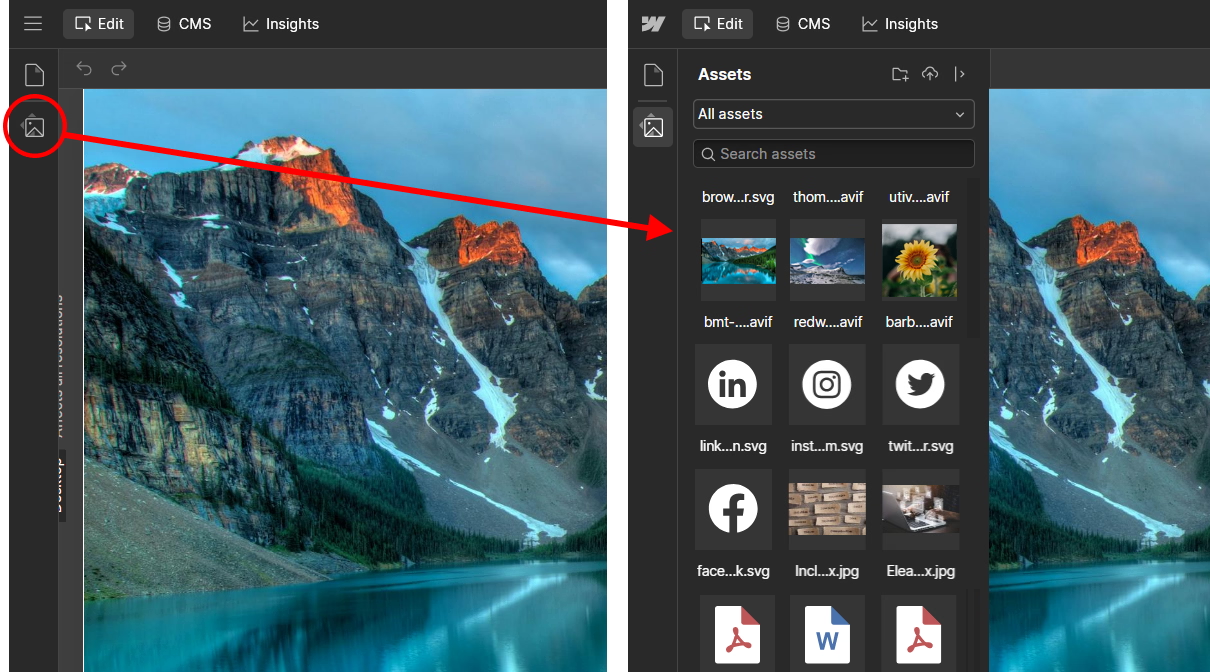
Editing Text
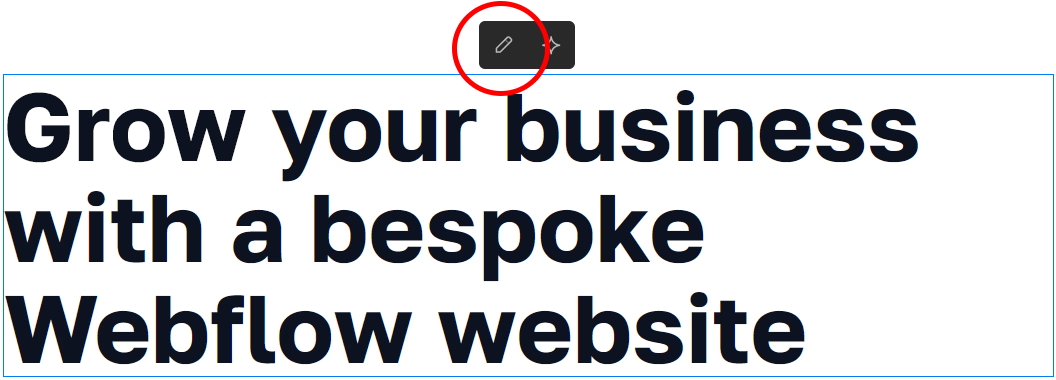
Hover over the content you want to change. The area will be highlighted with a faint blue box and a small pen icon (circled).
Click in the highlighted area and then you can start typing your changes.
⚠️ Important: Do not delete all the text before rewriting it. This may remove the entire text element, which you cannot restore yourself. If this happens, you'll need to contact me.
Changing Images
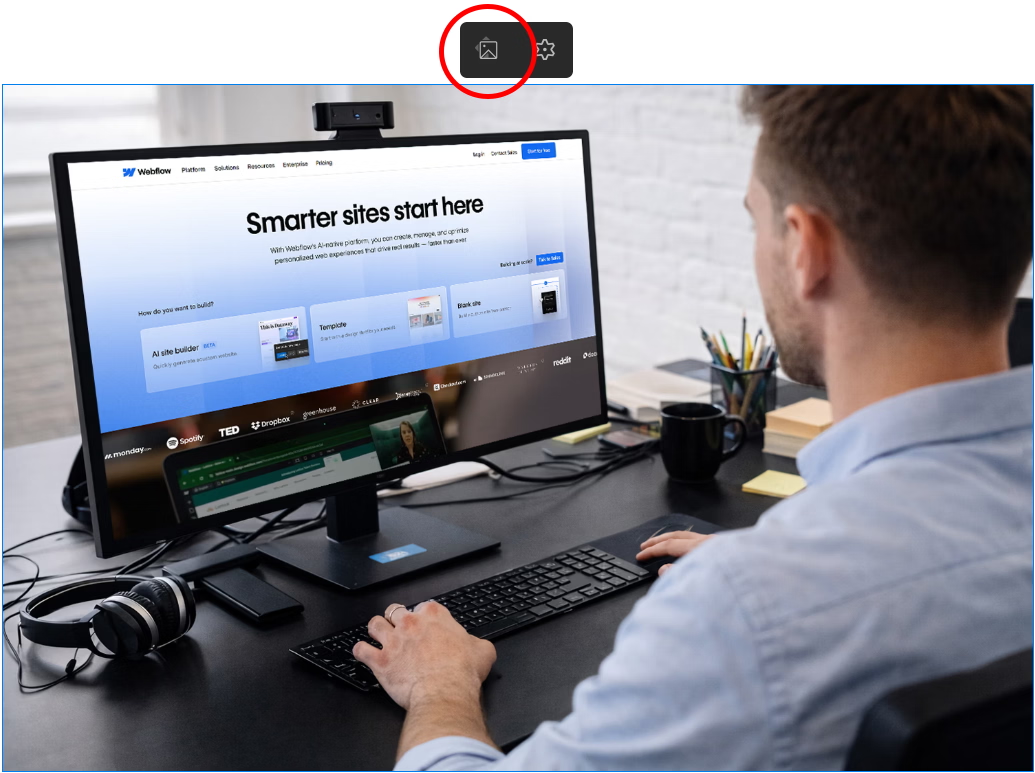
Hover over the image you want to change. The area will be highlighted with a faint box and a small image icon (circled).
- Click the image icon.
- Select a new image from the assets library.
- If you want a brand new image, first upload it to the asset library.
Uploading Images Correctly
To keep your website fast, please prepare images before uploading.
Never upload large, full-resolution images straight from a camera or phone. Not only are they far bigger than they need to be, but phones store image rotation separately, which does not always transfer to the web. This means a photo may appear sideways on your website.
Instead:
- Resize the image to roughly the size it will appear on the website
- Save as JPG, or preferably WEBP or AVIF for better performance
⚠️ Large images will slow your website down.
Rich Text Elements
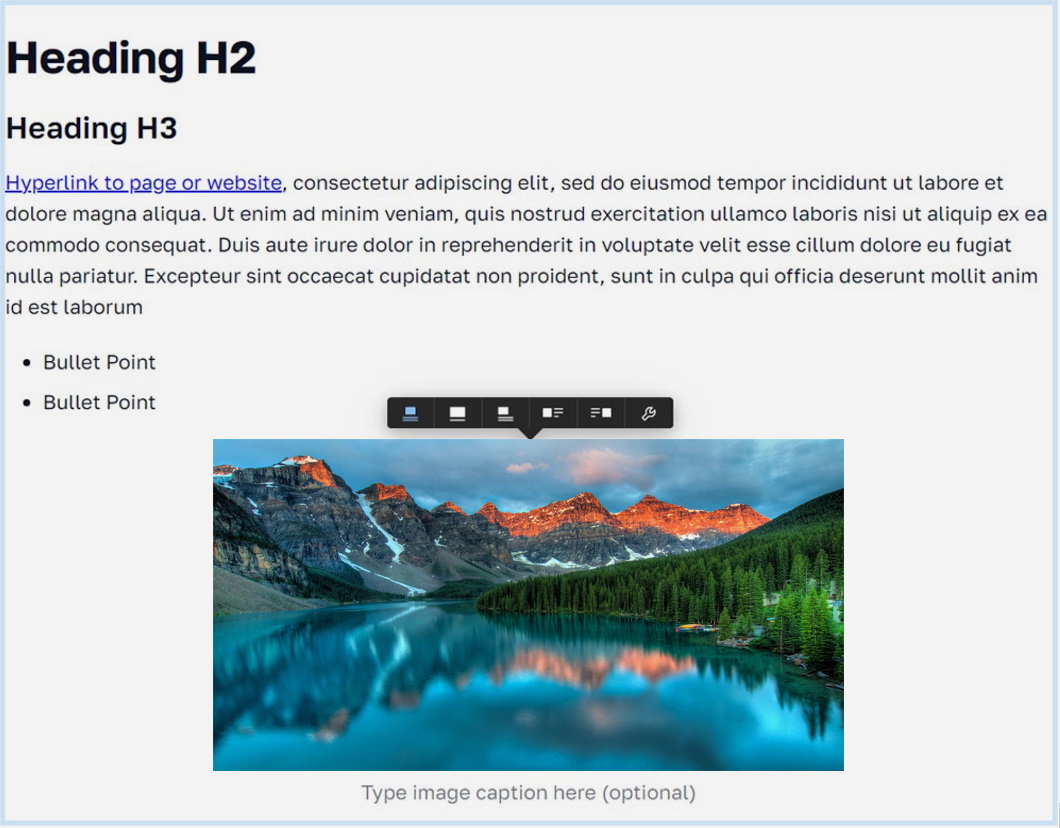
Most of your page content will have been built using Rich Text, which works much like a Word document. This element is incredibly versatile. You can:
- Add headings
- Apply bold or italic styling
- Insert hyperlinks and add quotes
- Add images
- Structure longer content clearly
Rich Text is ideal for blog posts, articles, and detailed pages.
⚠️ SEO Note: Please don’t use heading tags (H2, H3, H4) purely for styling. Incorrect heading structures can confuse search engines and negatively affect your rankings.
Editing Global 'Components'
Some parts of your website are shared across multiple pages. In Webflow, these are called Components. These are typically used for areas such as:
- The main navigation bar
- Menus
- The footer
- Call-to-action sections that appear throughout the site
Because these are shared, any changes you make will automatically update everywhere that Component is used.
This is very helpful, as it means you only need to edit the content once, rather than repeating the same change on every page.
When you are editing a Component, Webflow will display a message on screen to let you know.

Please take extra care when editing Components, as your changes will affect the entire website, not just the page you are currently viewing.
Dynamic Content
Some areas of your website, such as blogs, news, team members, or products, are managed using dynamic CMS Collections. Not all websites include these features, so this section may not apply to your specific site.
A CMS Collection stores your content in a central database and dynamically displays it within your website. This ensures every item remains visually consistent, while allowing you to easily add, edit, or remove dynamic content whenever needed.
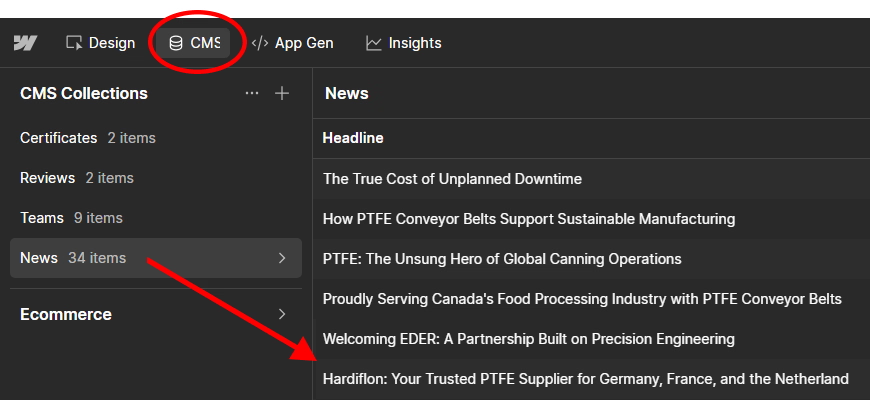
EG: News and News Articles.
From the CMS area, you can:
- View all items
- Create new items
- Edit existing items
- Archive or delete items
This system keeps your website organised, consistent, and easy to maintain.
Each CMS Collection has been carefully structured to suit your website's needs. In effect, creating new blog posts, team members and similar content is simply a form-filling exercise.
Blog Example:
- Headline
- Author
- Main Image
- Category Tags
- Brief Overview
- Blog Content
- Call to action
Some fields will be mandatory. Others may be optional and can be left blank.
Grab a coffee and let Webflow's Grímur guide you through editing your website.
Publishing
Publishing Changes to Your Website
When you make changes in Webflow, they are not always visible on the live website immediately.
This is important to understand. You can make a change, save it successfully, and still see the old version when you visit your website.
What happens next depends on whether you are editing a normal website page or a CMS item.
Sitewide Publishing
For changes made directly to website pages, such as editing text, replacing an image or changing content within a page, the website normally needs to be published before those changes appear on the live site.
On the right of the screen, you will see the Publish button.
Nothing goes live until the website is published.
⚠️ If several people are editing the website, agree who is working on the site and when. Publishing the website can also publish other changes that have been made but are not yet live.
Publishing CMS Items
CMS Collection items include content such as blog posts, news articles, team members, projects, events or other repeatable content managed through a Collection.
This is where clients most commonly get caught out.
When you edit an existing CMS item, Webflow does not automatically publish your changes to the live website.
After making your changes, you need to choose what should happen next.
Draft
The item or your latest changes are saved, but they are not published on the live website.
If you edit something and then simply leave it as a Draft, you will continue to see the previously published version on the live website.
Publish Now
Choose Publish Now when you want your changes to appear on the live website immediately.
This publishes that CMS item without requiring you to publish the rest of the website.
Stage for Publish
Choose Stage for Publish when your changes are finished, but you want them to go live the next time the whole website is published.
This is useful when several changes are being prepared and you want them all to go live together.
If Your Changes Are Not Appearing
If you have edited a CMS item but cannot see the change on the live website, first check its publishing status.
In most cases, the item has been saved as a Draft but has not yet been published.
Either:
- choose Publish Now to make the change live immediately, or
- choose Stage for Publish and then publish the website when you are ready.
Simply saving an edit does not necessarily make it live.
Scheduling and Removing CMS Content
CMS items can also be managed individually, allowing you to:
- publish new content immediately
- schedule content to go live at a future date
- prepare content now and publish it later
- remove content that is no longer required
This gives you control over individual CMS items without needing to publish unrelated website changes.
NEW: 'Marketer' Role
Advanced Editing and Page Creation
As part of Webflow’s new system, a powerful new role has been introduced called Marketer. Think of this as a more advanced editing role.
While the Content Editor role allows you to update existing content, the Marketer role provides much greater flexibility. It allows you to build entirely new pages using a library of pre-built page sections and templates.
These sections will be available in your asset library whenever you need them. To build a new page, a Marketer simply chooses a page template, drags the required sections onto the page, then replaces the placeholder text and images with the required content.
Because these sections have been pre-planned, designed and built in advance, any pages created will automatically match your website.
This makes it possible to quickly create pages such as:
- Landing pages for new services
- Campaign or promotional pages
- Event pages
- Additional service pages
- Location-specific pages
All without needing your web designer or any technical knowledge.
Importantly, the Marketer role still includes built-in safeguards. You can build and publish new pages, edit content, manage images, update SEO settings, and work with CMS content, but the underlying design system, styling, and technical structure remain protected.
Is the Marketer Role Right for You?
Most clients are perfectly served by the Content Editor role, which provides everything needed to keep their website content up to date.
However, if you would like the ability to create entirely new pages yourself, the Marketer role offers a safe and powerful way to do this, using the professionally designed assets already built into your website.
If this is something you would like to explore, please contact me and I will be happy to discuss whether the Marketer role is suitable for your needs, along with the associated setup and ongoing costs.
Restore / Backup points
Webflow automatically creates backups at regular intervals. If anything goes wrong, your site can be restored to a previous version, so you can edit with confidence knowing nothing is ever permanently lost.
And finally
Remember, I’m always happy to provide online training to help you manage your website with confidence. If you would like to schedule a Zoom Training session, please email hello@rugbywebdesign.co.uk